명명된 경로(named routes) 를 이용한 페이지이동
2022. 6. 14. 00:00ㆍFlutter
반응형
새 화면으로 이동 및 뒤로 레시피에서 새 경로를 생성하고
이를 네비게이터로 푸시하여 새 화면으로 이동하는 방법을 배웠다.
그러나 앱의 많은 부분에서 동일한 화면으로 이동해야 하는 경우
이 접근 방식을 사용하면 코드가 중복될 수 있다.
해결책은 명명된 경로를 정의하고 명명된 경로를 탐색에 사용하는 것이다.
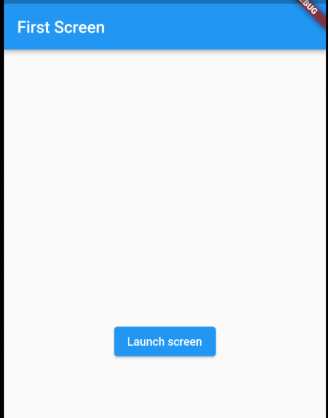
이전 강좌와 같이 두개의 화면을 만들어 보자
import 'package:flutter/material.dart';

class FirstScreen extends StatelessWidget {
  const FirstScreen({super.key});

  @override
  Widget build(BuildContext context) {
    return Scaffold(
      appBar: AppBar(
        title: const Text('First Screen'),
      ),
      body: Center(
        child: ElevatedButton(
          onPressed: () {
            // Navigate to the second screen when tapped.
          },
          child: const Text('Launch screen'),
        ),
      ),
    );
  }
}

class SecondScreen extends StatelessWidget {
  const SecondScreen({super.key});

  @override
  Widget build(BuildContext context) {
    return Scaffold(
      appBar: AppBar(
        title: const Text('Second Screen'),
      ),
      body: Center(
        child: ElevatedButton(
          onPressed: () {
            // Navigate back to first screen when tapped.
          },
          child: const Text('Go back!'),
        ),
      ),
    );
  }
}
이제 중복된 코드를 줄이기 위해 경로를 정의하자
class MainApp extends StatelessWidget {
  const MainApp({Key? key}) : super(key: key);

  @override
  Widget build(BuildContext context) {
    return MaterialApp(
      title: 'Named Routes Demo',
      // Start the app with the "/" named route. In this case, the app starts
      // on the FirstScreen widget.
      initialRoute: '/',
      routes: {
        // When navigating to the "/" route, build the FirstScreen widget.
        '/': (context) => const FirstScreen(),
        // When navigating to the "/second" route, build the SecondScreen widget.
        '/second': (context) => const SecondScreen(),
      },
    );
  }
}
이제 FirstScreen 으로 이동해서 SecondScreen 으로 이동하게 하자
// FirstScreen
...
onPressed: () {
  // Navigate to the second screen using a named route.
  Navigator.pushNamed(context, '/second');
}
...
이제 SecondScreen 에서 다시 FirstScreen 으로 돌아가게 하자
// SecondScreen
...
onPressed: () {
  // Navigate back to the first screen by popping the current route
  // off the stack.
  Navigator.pop(context);
}
...


관련영상
반응형
'Flutter' 카테고리의 다른 글
| 이전화면으로 이동시에 Data 전달 (Return Data) (0) | 2022.06.16 |
|---|---|
| 페이지 이동시 인수 (argument) 전달 (0) | 2022.06.15 |
| 페이지 이동 (0) | 2022.06.13 |
| 기본 Layout 예제 만들기 (5) (0) | 2022.06.10 |
| 기본 Layout 예제 만들기 (4) (0) | 2022.06.09 |