2023. 4. 17. 00:00ㆍWSL2
이전 version WSL 삭제
이전에 깔려 있던 WSL 이 있다면 과감히 삭제 하자.
윈도우스 10 에서 프로그램 제거 또는 변경 (설정 --> 앱 및 기능 에서 삭제해도 된다.)
linux 관련 삭제

ubuntu 관련 삭제


check 해제 한 후 재부팅 하면 완전히 삭제 된다.
Powershell 에서 최신버전 WSL 설치
이후 powershell 에서 다음을 실행하자
wsl --install그리고 재부팅을 한다.
재부팅 후에는 다음과 같은 화면이 나온다.

username 과 password 를 입력하자 (linux 에서 사용할 userid, pwd)
설정이 완료 되면 아래와 같은 상태가 된다.

exit 를 실행하자.
powershell 을 실행하자
wsl --version
이제 wt 에서 우분투를 실행하자

https://learn.microsoft.com/ko-kr/windows/terminal/install
Windows 터미널 설치
Windows 터미널을 설치하고 설정하는 방법을 알아봅니다.
learn.microsoft.com
windows terminal 설치가 귀찮다면 powershell 이나 cmd 창에서 그냥 wsl 을 입력하면 된다.
Ubuntu 최신버전 Update
Ubuntu 에 접속하기 전에 powershell 에서 wsl -l -v 를 이용해 Ubuntu 가 기본값인지 확인하자.

(*) 가 설정되어 있지 않다면 아래 명령을 실행해서 기본값(*) 설정을 하자
wsl -s <DistributionName>
wsl --setdefault <DistributionName>

// 둘중 아무 명령이나 사용하여 기본실행 linux 배포판을 설정 할 수 있다.
// 예시) wsl -s Ubuntu
이제 ubuntu 로 접속하자 (wsl 을 실행해도 되고 위 wt 를 이용해서 접속해도된다. )
이제 ubuntu 를 최신버전으로 upgrade 하자
우선 현재 설치된 Ubuntu 버전이 얼마인지 확인하자
cat /etc/os-release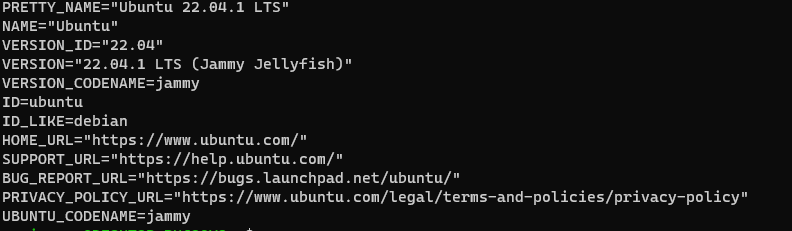
os 를 최신버전으로 update 하기 전 보류 중인 package 가 있는지 확인하여 해제한다.
sudo apt-mark showhold
sudo apt-mark unhold 패키지명
시스템의 모든 소프트웨어 package 가 최신 버전인지 확인한다.
# Refresh the apt repo
sudo apt update
# Apply all upgrades
sudo apt upgrade
upgrade 중에 prompt 는 Y 를 실행한다.
가장 최신 배포 버전을 사용할 수 있는지 확인하자
sudo apt dist-upgrade
Updage-manager-core 를 이용해서 LTS 만 upgrade 하도록 설정하자
sudo apt install update-manager-core

sudo nano /etc/update-manager/release-upgrades
sudo do-release-upgrade -d마지막으로 다시 os version 확인
cat /etc/os-release
Docket 설치
curl -sSL get.docker.com | sh20초 기다리면 도커 설치를 시작한다.
docker 가 잘 설치됐는지 확인해 보자
docker --versiondocker 명령자체가 sudo 를 필요로 하기 때문에 sudo 없이 명령어를 실행하도록 해보자
sudo usermod -aG docker $USER
이제 docker --version 이 아닌 docker version 을 실행해보자 좀더 많은 내용이 view 에 보일 것이다.
docker version
그런데 docker demon 에 대해서는 실행이 안되어 있는것을 알수 있다.
이것은 Ubuntu 22.04 이상 버전에서 나타나는 오류이다.
iptables 와 관련된 issue 인데 wsl 에서 docker 사용시 호환성 issue 가 있다.
다음 명령을 통해서 해결해 보자
sudo update-alternatives --config iptableslegacy 를 선택하자 (아마 1번일 것이다.)

이제 powershell 에서 wsl 을 재부팅 하자
wsl --shutdown이제 docker demon 을 실행해 보자
sudo service docker start이제 docker version 을 다시 실행해 보자
docker version
이제 wsl 을 종료해보자. powershell 에서
wsl --shutdown
그후 다시 실행해보자
WT 에서 ubuntu 를 선택해서 열거나 wsl 을 입력하자
그리고 다시 version 을 체크해보자
docker version
daemon 관련 오류가 다시 나타난다.
wsl 을 종료 후 다시 시작하면 docker daemon 을 다시 실행해 줘야 한다.
물론 wsl 이 아닌 우분투에서는 systemd 를 이용하여 다시 실행 시키도록 등록 가능 하다.
하지만 wsl 에서는 systemd 를 그냥 이용할 수 없다.
(설정을 해줘야함)
그래서 systemd 없이 (systemctl) wsl 실행시 자동으로 docker demon service 가 실행되도록 해보자.
시스템 기본 디렉토리에서 다음을 실행하자
sudo nano .profile# set docker auto start
if grep -q "microsoft" /proc/version > /dev/null 2>&1; then
if service docker status 2>&1 | grep -q "is not running"; then
wsl.exe --distribution "${WSL_DISTRO_NAME}" --user root \
--exec /usr/sbin/service docker start > /dev/null 2>&1
fi
fictrl +x 하고 저장해서 나오자
이제 visudo 에 권한 설정을 해서 sudo 를 통한 명령에 password 가 필요 없도록 해보자
sudo visudousername ALL=(ALL) NOPASSWD:ALL보안에 영향이 있으니 주의해서 작업하자 특정 명령에만 작동하도록 할 수 있다.
username ALL=(ALL) NOPASSWD: /usr/bin/dockerd이제 powershell 에서 다시 아래 명령을 실행하고 ubuntu 에 다시 접속해 보자
wsl --shutdown그리고 아래 명령을 실행하자
docker version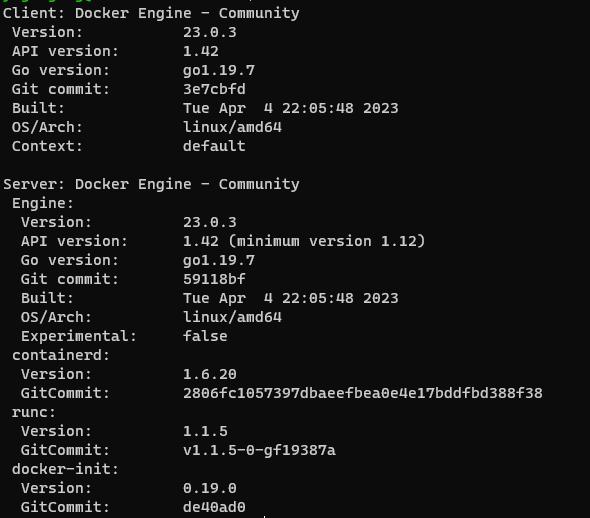
이제 문제 없이 실행되는 것을 알수 있다.
자 이제 위에서 말했던 systemd 문제를 해결해 보자.
다음 명령을 해보자
sudo nano /etc/wsl.conf[boot]
systemd=truectrl + x 한 후 저장하고 나오자
이제 아래 명령을 powershell 에서 실행하자
wsl --shutdown우분투에 다시 접속한 후 아래 명령 실행해보자
systemctl list-unit-files --type=service오류 없이 정상 실행되면 ctrl +c 를 통해 나오자
systemctl위 명령도 정상적으로 된 다면 이제 systmctl (systemd) 관련 명령은 처리가 가능 하다.
그리고 이제 이전 .profile 을 수정할 때가 되었다.
.profile 에는 WSL 에서 우분투 실행시 docker demon service 를 자동으로 실행해 주기 위한 코드가 들어 있다.
이제 이부분을 주석 처리 하자
sudo nano .profile

아래와 같이 주석 처리 하자
# set docker auto start
#if grep -q "microsoft" /proc/version > /dev/null 2>&1; then
#    if service docker status 2>&1 | grep -q "is not running"; then
#        wsl.exe --distribution "${WSL_DISTRO_NAME}" --user root \
#            --exec /usr/sbin/service docker start > /dev/null 2>&1
#    fi
#fi
그리고 다음 명령을 실행 하자.
sudo systemctl enable docker.service
sudo systemctl enable containerd.service
이제 wsl --shutdown 을 통해서 우분투를 다시 실행 하고
docker version 을 실행 하자
정상적으로 실행 될것이다.
자 여기 까지가 wsl2 를 이용하여 최대한 native 한 우분투 시스템과 비슷하게 setting 한 과정 이다.
여기에 docker 를 docket desktop 없이 설치 하였고 자동으로 demon service 가 실행 되도록 하였다.
이제 docker compose 관련된 plugin 을 설치하자
 sudo apt-get update
 sudo apt-get install docker-compose-plugin
이미 최신버전이 설치 되어 있다고 표시될수도 있다.
docker compose version정상 실행 된다면 wsl 설치 및 docker 설정이 정상적으로 완료 된 것이다.
우리는 docker desktop 없이 작업 하였고 이후에 진행된 kubernetes 관련 작업도 desktop 없이 실행할 것이다.
(rancher desktop 이라는 것과 k3s 를 이용할 것이다. )
**** 만약 ubuntu 이외에 다른 버전을 설치 하고 싶다면 아래 명령을 통해 설치 가능한 버전을 확인하자**
wsl --list --online
관련영상
'WSL2' 카테고리의 다른 글
| Docker client 를 이용한 Windows 에서 docker 사용 (0) | 2023.08.21 |
|---|---|
| Docker 설치 (Without Docker Desktop) (0) | 2022.11.29 |
| Ubuntu mysql service 자동시작 (0) | 2022.01.19 |
| WSL2 에서 MySql root 계정으로 remote, localhost 모두 접속 하기 (0) | 2022.01.05 |