2023. 7. 10. 00:00ㆍ카테고리 없음
https://yogingang.tistory.com/437
ASPNET Core SignalR 을 이용한 Push Server 구현 - 1
signalR core 는 dotnet core 에서 실시간 통신을 위해 내놓은 비동기 양방향 통신 frameworks 이다. aspnet core 위에서 돌아가는 형태 이다. https://yogingang.tistory.com/404 Rest API Template 만들기 - EP 01 (Create , Swagger
yogingang.tistory.com
https://yogingang.tistory.com/439
ASPNET Core SignalR 을 이용한 Push Server 구현 - 2 (인증처리)
SignalR 관련해서도 인증처리가 가능 하다. 일반적으로 인증서버를 만들고 해당 서버로 부터 인증처리 하도록 한다. https://yogingang.tistory.com/412 Rest API Template 만들기 - EP 08 (DB 를 통해 AccessToken 및 Ref
yogingang.tistory.com
이제 rest api 를 추가하여 api 를 통해 특정 client 들에 push 하도록 해보겠다.
client 들은 channel 에 접속만 되어 있고 관리자가 특정 channel client 들에 실시간으로
message 를 전달하고 싶을 수도 있다.
이럴 경우 RestAPI 를 노출하여 channelId 를 입력으로 받고 client 들에 전송가능 하다.
아래와 같이 minimal api 를 추가해 보자
Program.cs
var pushRouter = app.MapGroup("push").WithOpenApi();

pushRouter.MapPost("all",
    async ([FromBody] ChannelMessageInfo messageInfo, IHubContext<ChannelHub> hubContext)
    => await hubContext.Clients.Group(messageInfo.Id).SendAsync("receiveMessage", messageInfo.Message));

pushRouter.MapPost("user",
    async ([FromBody] ChannelMessageInfo messageInfo, IHubContext <ChannelHub> hubContext)
    => await hubContext.Clients.Group(messageInfo.Id).SendAsync("receiveMessage", messageInfo.Message));
ChannelMessageInfo
class ChannelMessageInfo
{
    public string Message { get; set; }
    public string Id { get; set; }
}
signalR server 를 실행 시키자 .swagger 에 /push/all , /push/user 가 추가된 것을 확인 가능하다

이 후 client 를 실행 시키고 channel id 와 join id 를 알아내자
그리고 all 와 user 를 실행 시키면 restapi 를 통해 client 들에 message 가 전달된다.
그런데 이제 위에 API 선언 및 정의 부분을 확인하면 모두 program.cs 라는 파일에 집중되어있다.
간단한 program 이라면 별 상관 없겠지만 실무에서 쓰인다면 문제가 있는 code 라고 생각된다.
그래서 이 project 에 vertical slice architecture 를 적용하여 변경해 보겠다.
일단 features 라는 폴더를 만들고 push 폴더를 만든 후 여기에 all 과 user 를 처리 하도록 하겠다.
routes 관련된 내용들도 endpoints 라는 파일로 따로 분리 하겠다.
** 현재 aspnet 7 minimal api 는 router 를 여러파일로 분리한 후 하나로 include 해주는 작업을 지원하지 않는다.
extension method 를 통해서 처리 하는 방법이 가장 간단한 방법이다.
하지만 다른 방법을 사용해 보겠다. DI 를 이용하여 endpoints 를 분리하고 merging 하겠다.
이 방법은 Carter 라는 dotnet framwork open source 에서 힌트를 얻었다. **
자 폴더 구조를 수정해보자
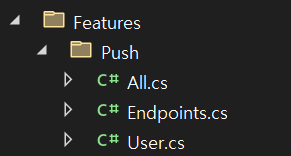
위와 같은 구조로 Features --> Push --> All.cs, Endpoints.cs, User.cs 를 추가하자
Endpoints.cs 는 route 정보를 가지고 있다. (Controller 역할)
All.cs 와 User.cs 는 각 기능의 주요 로직을 처리 하는 handler 역할을 한다.
이제 Endpoints.cs 를 구현하기 위한 DI 활용방법을 알아보자.
Scrutor 를 이용하여 특정 인터페이스를 구현 또는 상속한 모든 클래스와 인터페이스를 등록하자
dotnet add package ScrutorShared --> Injectables --> IInjectable.cs
namespace SignalRTemplate.Shared.Injectables;

public interface IInjectable { }
public interface ITransient : IInjectable { }
public interface IScoped : IInjectable { }
public interface ISingleton : IInjectable { }
이제 위 인터페이스들을 DI 에 자동으로 등록되도록 하자
Program.cs
builder.Services.Scan(scan => scan
                               .FromEntryAssembly()
                               .AddClasses(
                                   classes => classes.AssignableTo<ITransient>()
                                )
                               .AsSelfWithInterfaces()
                               .WithTransientLifetime()
                               .AddClasses(
                                   classes => classes.AssignableTo<IScoped>()
                                )
                               .AsSelfWithInterfaces()
                               .WithScopedLifetime()
                               .AddClasses(
                                   classes => classes.AssignableTo<ISingleton>())
                               .AsSelfWithInterfaces()
                               .WithSingletonLifetime()
                               );
Shared-->Interfaces-->IEndpoints.cs
public interface IEndpoints:ITransient
{
    void AddEndPoints(IEndpointRouteBuilder routes);
}
위 AddEndPoints 에 app.MapGet ... 등을 작업을 구현하면
IEndPoints 를 구현한 모든 class 들을 찾아서 AddEndPoints 를 call 해주면
자동으로 router 에 경로가 등록되게 되는 것이다.
AddEndPoints 를 call 해줄 확장 메소드를 작성하자
Shared-->Extensions-->WebApplicationExtension.cs
using SignalRTemplate.Shared.Interfaces;

namespace SignalRTemplate.Shared.Extensions;

public static class WebApplicationExtension
{
    public static void MapEndpoints(this WebApplication self)
    {
    	// DI 시스템을 이용해 IEndpoints 로 등록된 모든 class 를 찾는다.
        var endpoints = self.Services.GetServices<IEndpoints>();
        foreach (var endpoint in endpoints)
        {
            endpoint.AddEndPoints(self);
        }
    }
}
이제 Program.cs 에 다음출 추가한다.
app.MapEndpoints();
이제 MediaR 을 추가 하자
dotnet add package MediatRProgram.cs 에 mediatR 을 사용한다고 등록하자
builder.Services.AddMediatR(cfg => cfg.RegisterServicesFromAssembly(typeof(Program).Assembly));이제 기본적인 준비는 되었으니 Features 를 구현해 보자
Endpoints.cs
using MediatR;
using Microsoft.AspNetCore.Mvc;
using Microsoft.AspNetCore.SignalR;
using SignalRTemplate.Shared.Interfaces;
using SignalRTemplate.SignalR;

namespace SignalRTemplate.Features.Push;
public class Endpoints : IEndpoints
{
    public void AddEndPoints(IEndpointRouteBuilder routes)
    {
        var routeGroup = routes.MapGroup("push").WithOpenApi();

        routeGroup.MapPost("all",
        async ([FromBody] All.Command request, IMediator mediator) => await mediator.Send(request));

        routeGroup.MapPost("user",
        async ([FromBody] User.Command request, IMediator mediator) => await mediator.Send(request));
    }
}
All.cs
using MediatR;
using Microsoft.AspNetCore.SignalR;
using Microsoft.Extensions.Configuration;
using SignalRTemplate.Shared.Interfaces;
using SignalRTemplate.SignalR;

namespace SignalRTemplate.Features.Push;

public class All
{
    public class Command : IRequest<Response>
    {
        public string Id { get; set; }
        public string Message { get; set; }
    }
    public class Response : BaseResponse
    {
    }

    public class CommandHandler : IRequestHandler<Command, Response>
    {
        private readonly IHubContext<ChannelHub> _hubContext;

        // ITokenGenerator 를 Constructor injection
        public CommandHandler(IHubContext<ChannelHub> hubContext)
        {
            _hubContext = hubContext;
        }

        public async Task<Response> Handle(Command request, CancellationToken cancellationToken)
        {
            var response = new Response { Result = false };
            await _hubContext.Clients.Group(request.Id).SendAsync("receiveMessage", request.Message);
            response.Result = true;
            return response;
        }
    }

}
User.cs
using MediatR;
using Microsoft.AspNetCore.SignalR;
using SignalRTemplate.Shared.Interfaces;
using SignalRTemplate.SignalR;

namespace SignalRTemplate.Features.Push;

public class User
{
    public class Command : IRequest<Response>
    {
        public string Id { get; set; }
        public string Message { get; set; }
    }
    public class Response : BaseResponse
    {
    }

    public class CommandHandler : IRequestHandler<Command, Response>
    {
        private readonly IHubContext<ChannelHub> _hubContext;

        // ITokenGenerator 를 Constructor injection
        public CommandHandler(IHubContext<ChannelHub> hubContext)
        {
            _hubContext = hubContext;
        }

        public async Task<Response> Handle(Command request, CancellationToken cancellationToken)
        {
            var response = new Response { Result = false };
            await _hubContext.Clients.Group(request.Id).SendAsync("receiveMessage", request.Message);
            response.Result = true;
            return response;
        }
    }
}
이제 실행해보자
(swagger 를 이용할 경우 오류가 날 수 있다. 다음과 같이 program.cs 를 수정하자)
builder.Services.AddSwaggerGen(c =>
{
    c.SwaggerDoc("v1", new OpenApiInfo { Title = "SignalR Template API", Version = "v1" });
    c.AddSecurityDefinition("Bearer", new OpenApiSecurityScheme
    {
        In = ParameterLocation.Header,
        Type = SecuritySchemeType.Http,
        Name = "Bearer",
        BearerFormat = "JWT",
        Description = "Please enter authorization key",
        Scheme = "Bearer"
    });
    c.AddSecurityRequirement(new OpenApiSecurityRequirement()
                {
                    {
                        new OpenApiSecurityScheme()
                        {
                             Reference = new OpenApiReference()
                             {
                                 Type = ReferenceType.SecurityScheme,
                                 Id = "Bearer"
                             }
                        },
                        Enumerable.Empty<string>().ToList()
                    }
                });
    c.CustomSchemaIds(x => x.FullName?.Replace("+", "."));
});
내부 class 를 인식 못하는 버그가 있으니 위와 같이 수정한 후 실행하자.
c.CustomSchemaIds(x => x.FullName?.Replace("+", ".")); <-- 이라인이 버그를 수정하는 라인이다.
그외 라인들은 기본정보와 bearer token 을 처리 하기 위한 것이다.
관련영상